
The conservatory.
Click on the pictures for larger images.
This page will show the progress of the conservatory. We decided to build this for one main reason, the house has two parts and going from one to the other in winter will be very cold. This is especially true if we need the toilet at night as the bathrooms are in the other part to the bedrooms.

I have always wanted to have a go with one of these!
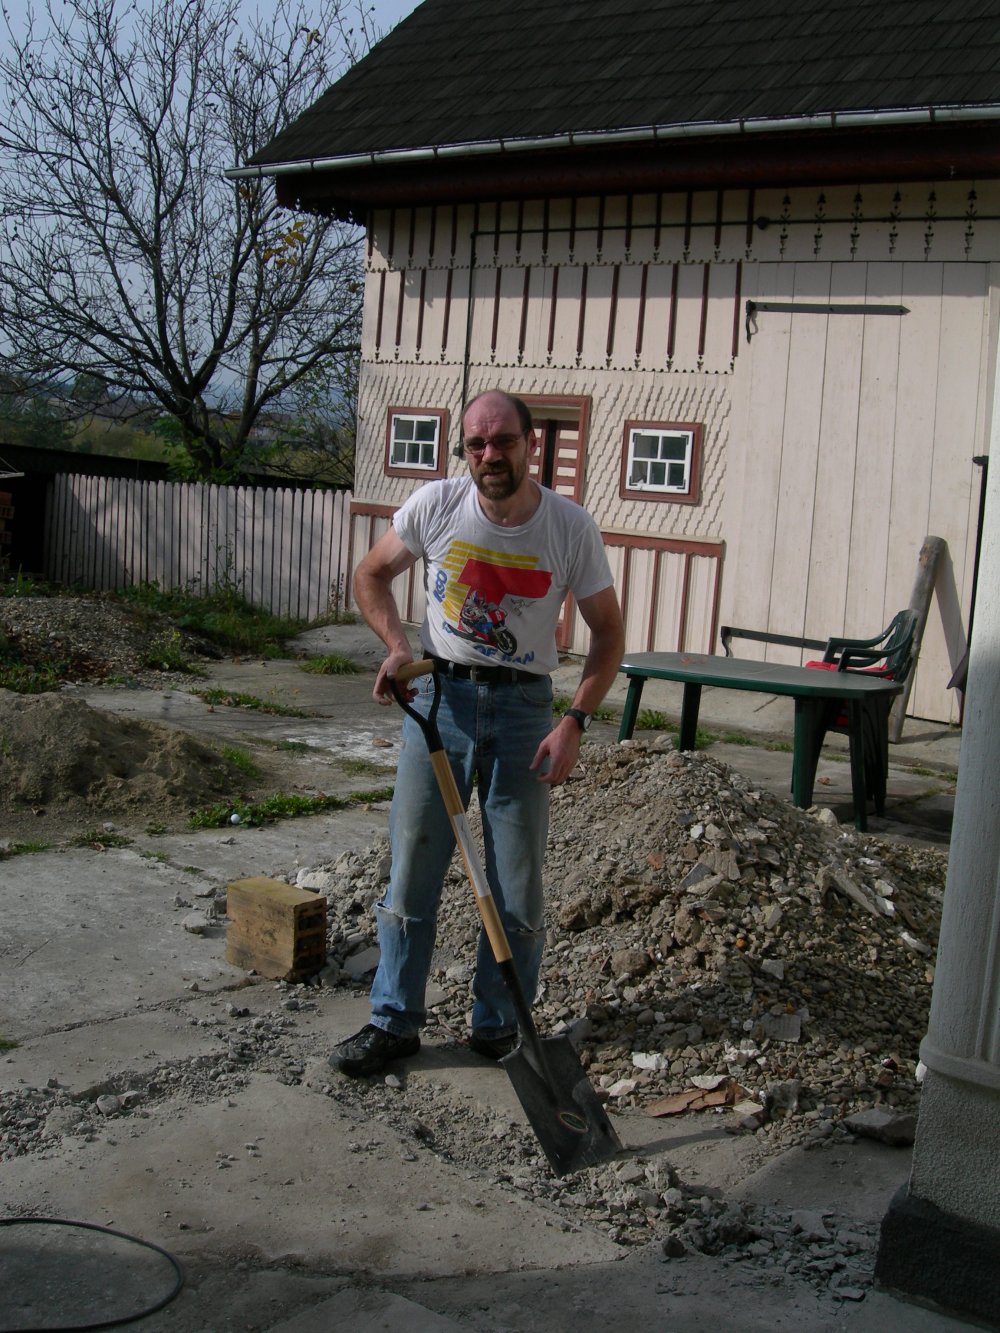
I started the build on Tuesday the 14th October 2008. I measured out the ground and worked out how big to build it.
I have always wanted to have a go with a hammer drill like this. Thursday I hired one and had fun breaking concrete. I had not realised how heavy they were until I used one. I think my arms must have more muscles in them.
Now more hard work, the big dig.
Then came the big dig. I dug out trenches for the foundations and I aim to build a dwarf wall and put the uPVC on top of that.
It is Friday as I write this and I am able to write these updates today as it is raining outside. No more work on the conservatory today. The weather forecast says it should get better so I am hoping to do more Saturday.
I will update this page as work commences on the conservatory so keep coming back for more updates. Regular updates on the house will be added to the house page in the normal way.
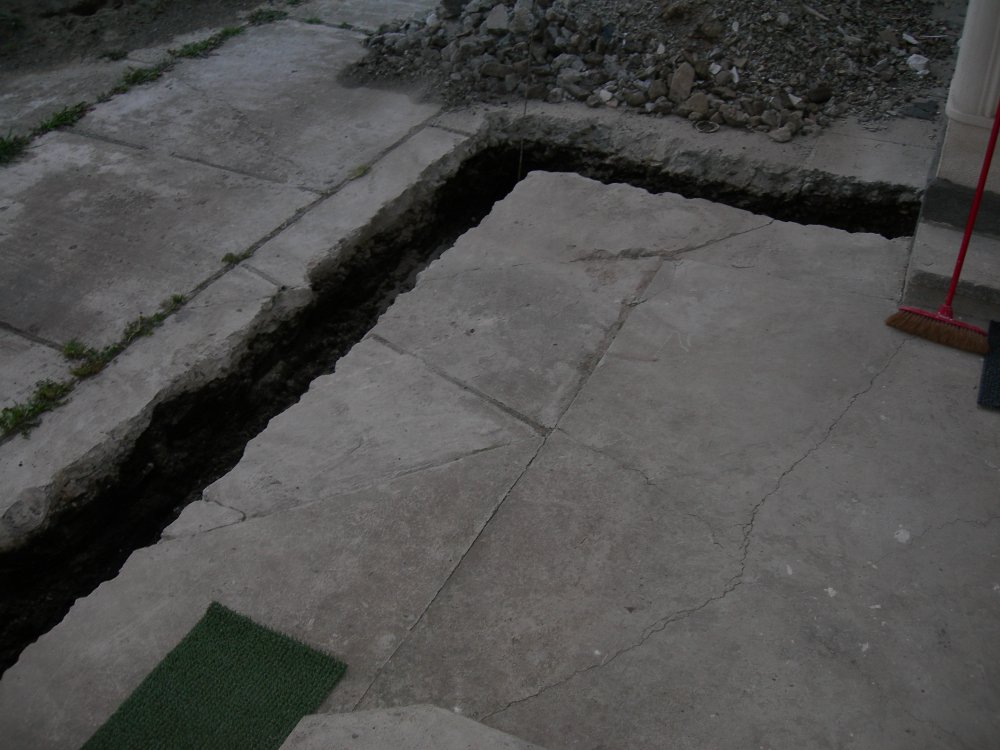
The trenches finished waiting for the concrete.
Saturday was dry but I waited for the concrete to dry properly and Monday I started work again. We went to the local DIY shop and got the bricks/blocks etc. and I got the cement mixer out.
I mixed all day and ended up with the foundations laid. More hard work but very rewarding when you see the stages being finished.
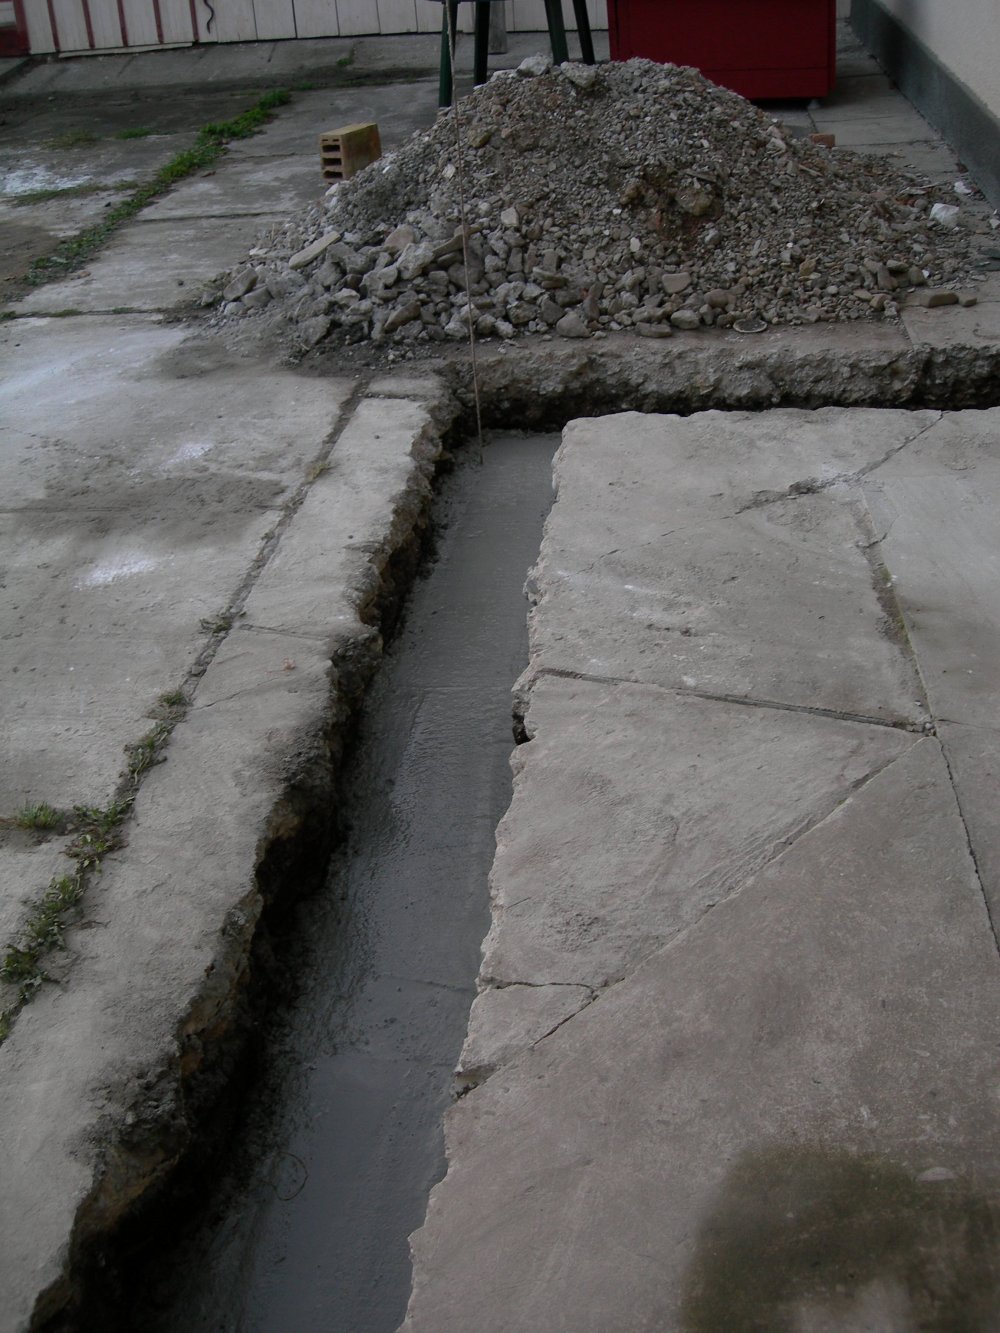
The concrete laid in the trenches.
Tuesday and I started work early. I have never built a wall before so as this was my first time I wanted to take my time and get it right.
When we went to the shop I had worked out how many square metres of bricks I needed. It worked out at 500 plus and it sounded a lot, and I thought expensive as it worked out around £1,600 just for the bricks. At the shop I explained what I wanted to do and the sizes I had and the guy there said we should use BCA blocks saying they would be cheaper, easier to do and quicker as they are much larger than bricks. This we went for and we loaded up the fifty eight blocks and mortar.
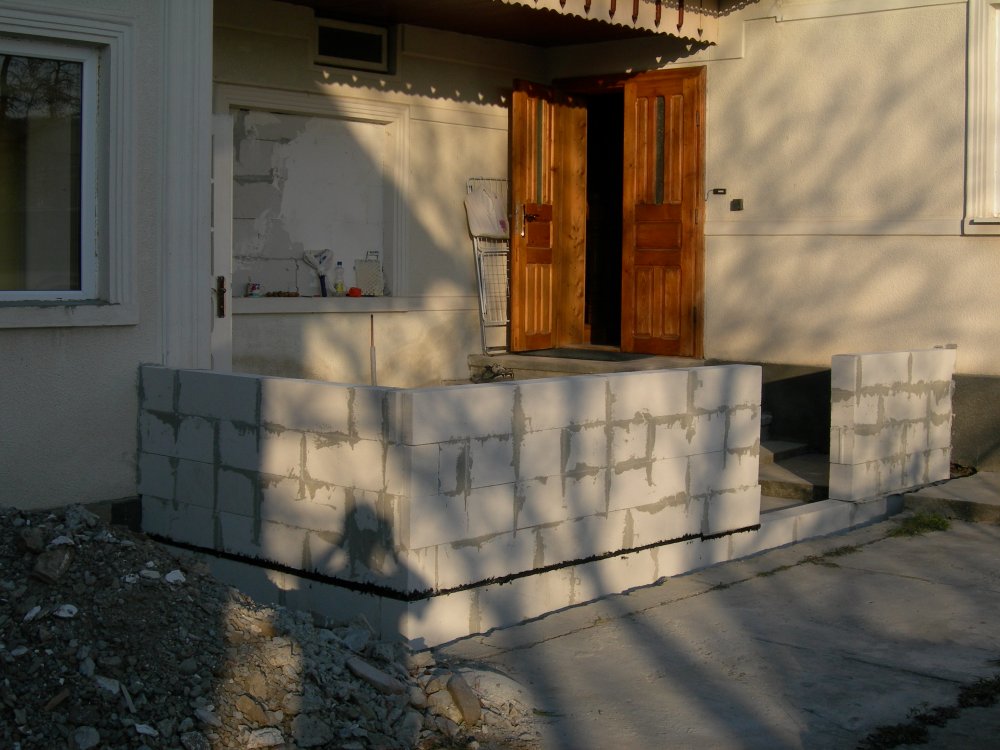
The finished wall.
I put the first round of bricks in carefully and they all seemed OK. I then continued and was quite pleased until I looked end on at the small portion to the right of the door hole from the outside. I did not need to measure anything......the wall was just leaning. I found this late in the day and so I knocked it down before the mortar had time to set solid.
Today, Wednesday I rubbed off the old mortar from the bricks I knocked down ready to rebuild. I had a close look at the main wall and that was OK. After that I got started rebuilding the wall and finishing off the main part. I took even more care this time and got finished this after noon. The next stage is to concrete the floor after I calculate how much concrete we will need. I think I will get this delivered ready mixed as it looks like it will be quite a lot of concrete. I will also be putting the polystyrene on the outside of the wall ready for it to be plastered.
Now the wall is up it is starting to look like a conservatory !!
Update October 31st
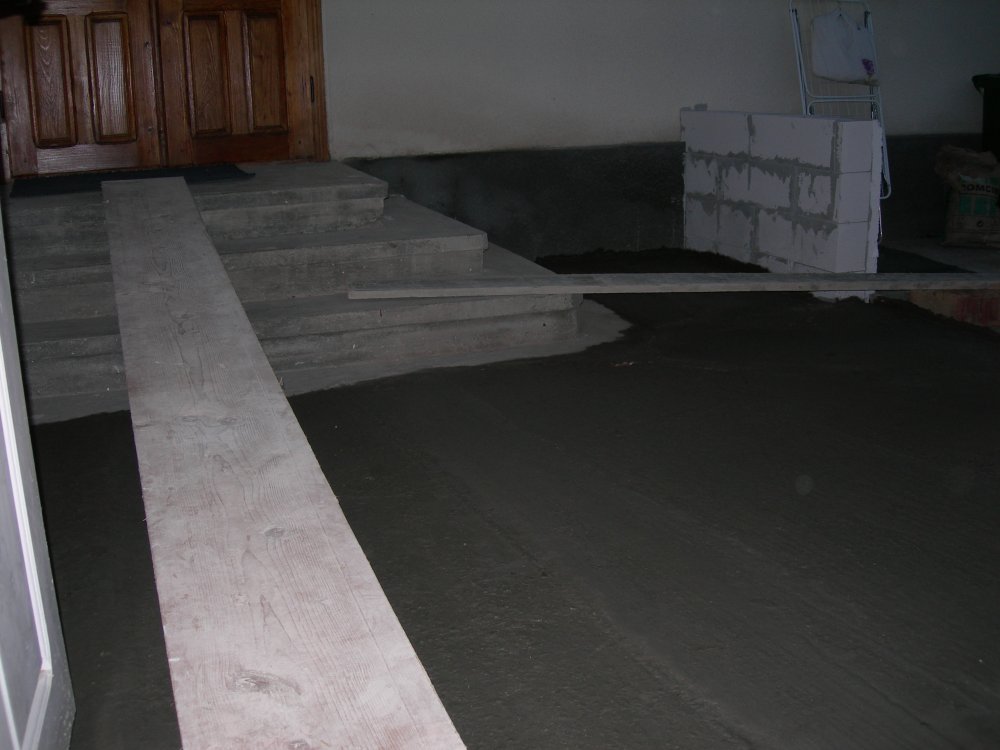
The concrete laid as the new floor.
Wednesday 29th I started to fill in the area with hardcore. As the ground was sloping away from the doors one end needed quite a bit more than the other. The next day would be concrete time.
I tried to get a local concrete firm to deliver a small amount of concrete that I needed for the floor base. As they were not working in our area they would not deliver as I only needed around one cubic metre of concrete. I decided that I would have to mix it with a mixer as it was too expensive to have that small amount delivered.
I got a friend to help and we set off mixing and pouring. A few hours later and we had it all laid. The next problem was trying to keep Laxey the cat in the house as we knew he would be putting his paw prints in and signing his name. He did escape once and so we have around five paw prints going out the door space.
We are now waiting for the double glazing people to arrive and give us a quote, then we can go ahead and get it all covered in. The last few days have been unusually warm for this time of year so it has not been too bad working outside.
Update December 12th
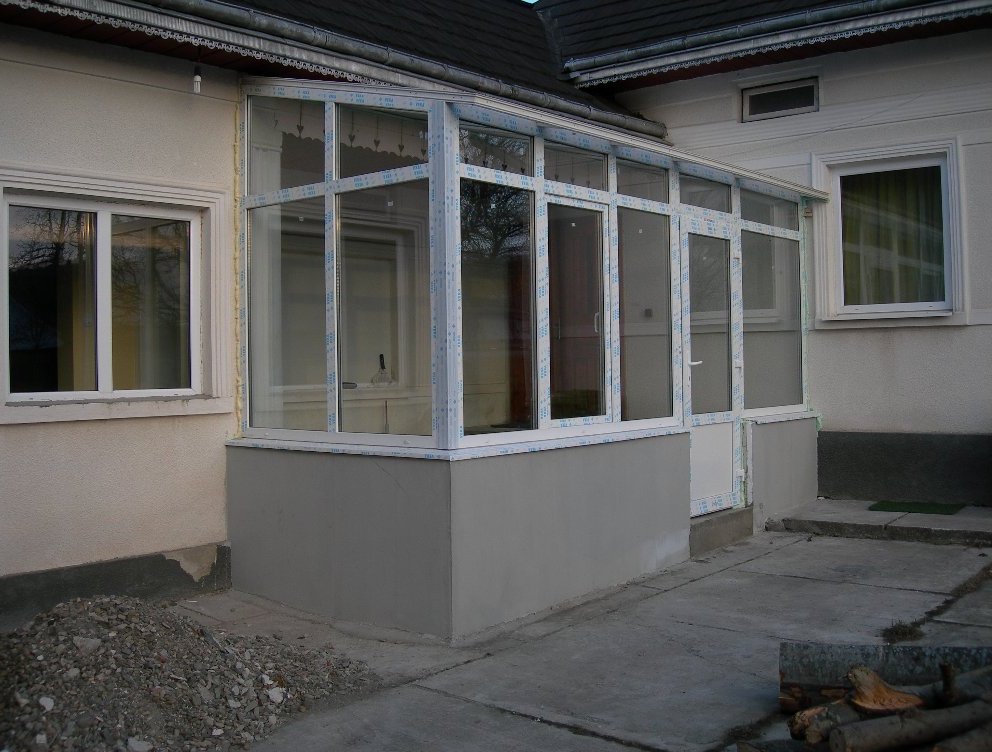
The conservatory viewed from the outside.
We got three quotes and went for the quote with the middle price. One was just too expensive and the cheaper quote......the company had not made anything like this so they seemed out of their depth. The other company took us to see a construction they had done for someone else similar and we felt they could do what we were asking for. Conservatories are just not used over here like they are in the UK so no one has experience of making them
We were told that the uPVC parts would be up sometime in November by the company making the conservatory. This of course did not happen and the conservatory from the outside was finished on Thursday the 11th of December after putting a couple of things right.
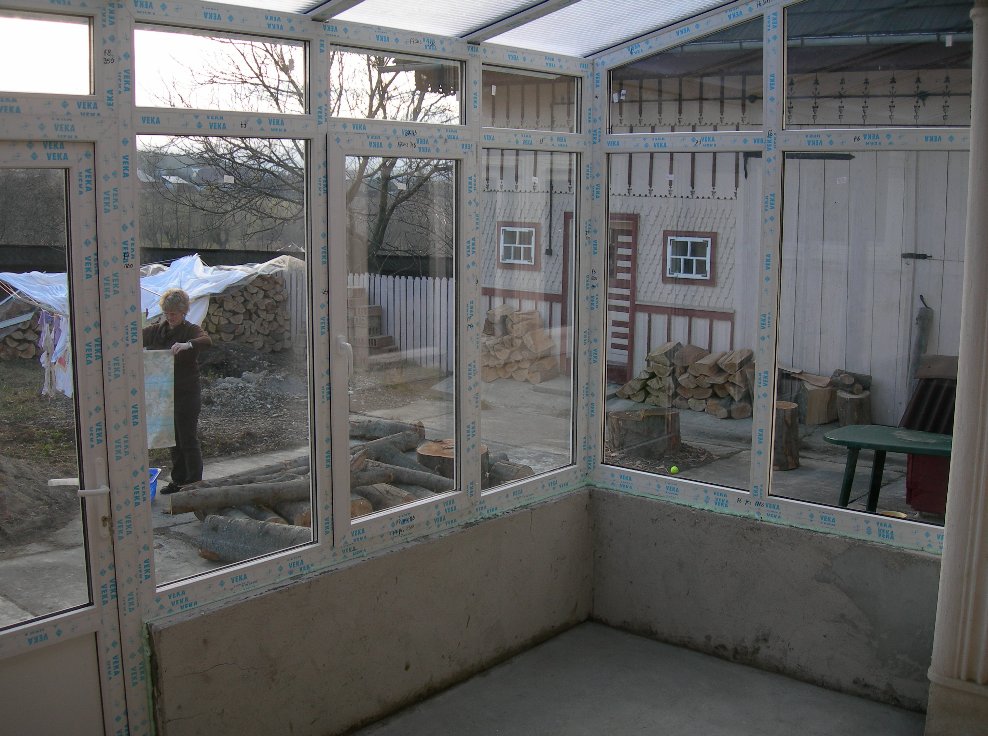
The conservatory inside.
Now the structure is up we will get the builders to come back and plaster the walls inside and out. Then it will be my turn to tile the floor, install electrics and basically finish it off.
We are happy with it and have found the house is warmer because of it. Keep watching for the finished product.
Update January 17th 2009
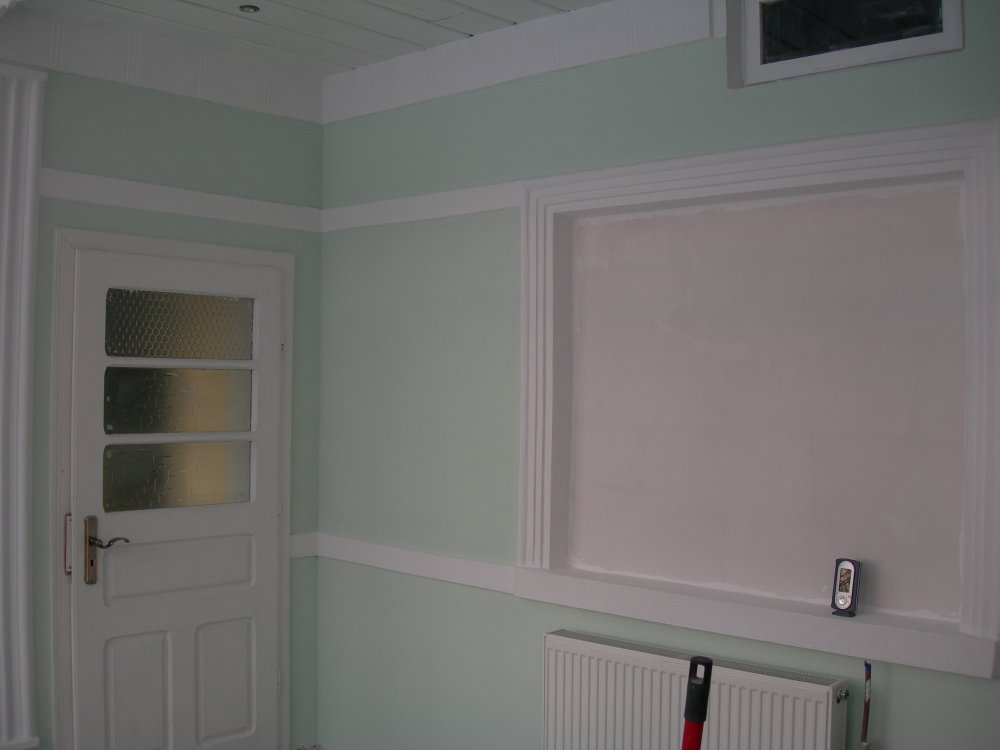
The conservatory painted.
Just before Christmas we got the plasterer to come back and finish plaster the walls inside. This meant that after Christmas and the New Year period I could get on with more work inside.
As usual Sue picked green for the main colour of the conservatory and the fancy plasterwork was picked out in white. I have painted the ceiling of the roof overhang white and installed some spot lamps. They still need wiring up though.
The window sills have had a run of tiles put on and the floor tiles have started to be laid. I can not lay them all in one go as we need to get from one side of the house to the other.
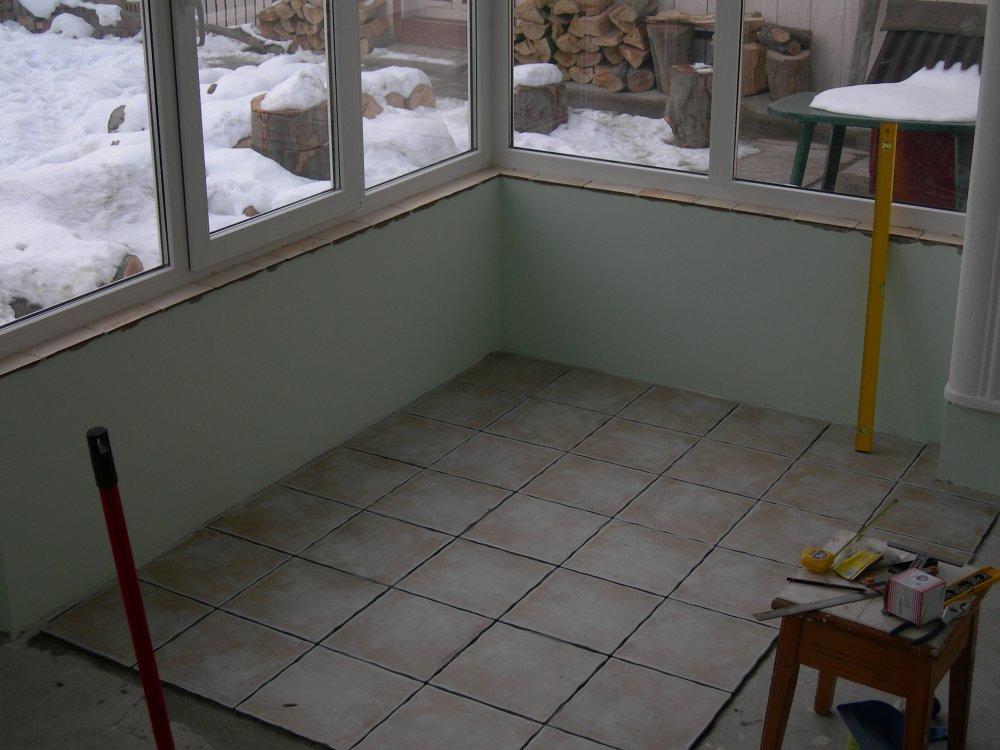
The floor tiles going down.
The tiles on the window sills come in random colours of beige with the odd blue tint on some. We bought these originally for the space where the window used to be. They also have a random pattern on them that look like trees. We have used the lighter ones for the window sill and will buy some more to replace the ones we have used. We were hoping for more with blue on to try to make sky and have them at the top but we only got what the shop had left and so Sue will have them in a random order.
When you look at the last photo and the one from the last update you will see there is a big difference between the two photos. They were taken from about the same position.
Update February 4th 2009
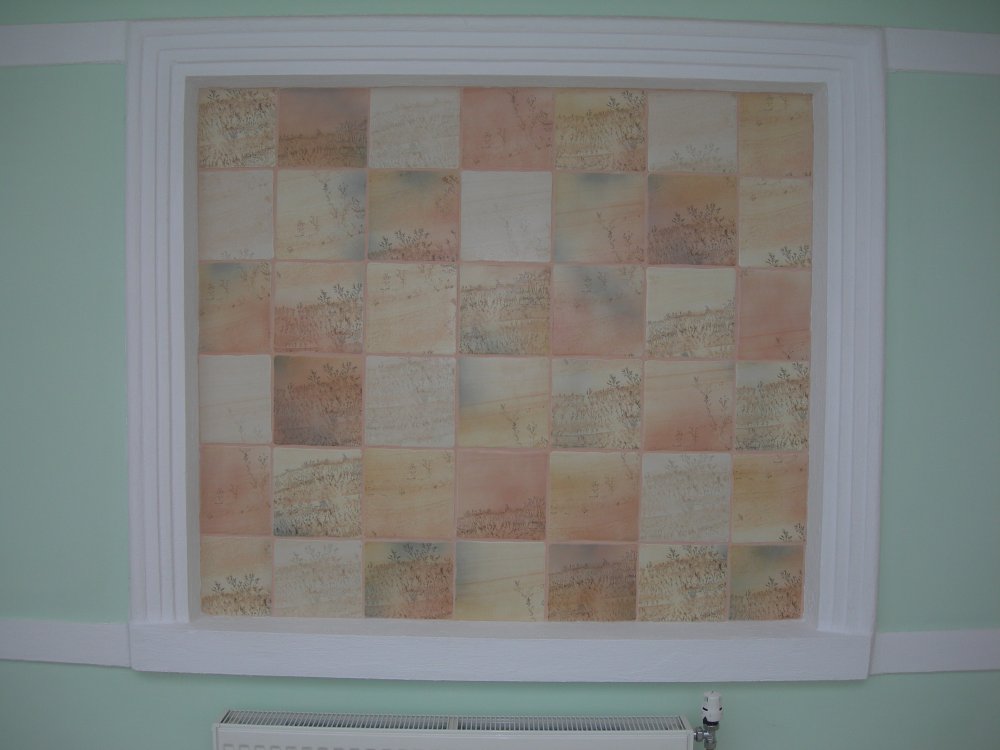
The tiles in the old window frame.
I now have all the tiles down on the floor, and the tiles on the "ex" window.
The window is now finished as in the photo above. We made this a random pattern and we are very pleased with it.
I will wait to photograph the floor as I don't have the grout filled in yet. We had a problem with the floor tiles, somehow we managed to measure up wrongly and found we were short by quite a few. We also think that we originally decided not to tile the fronts on the steps and then when we started to tile, thought it would look better tiled so that left us short too.
When we looked for more we found the shop had run out and were not re-stocking them. We wondered what to do. We went to the shop where we bought the window tiles and found they do a floor tile in a similar pattern so decided on them for the steps and the original ones for the floor.
Aslo, after grouting half of the steps Sue decided she did not like the colour, it was supposed to be beige but ended up an orange colour. We bought grey for the floor tiles but have now changed the grey for a brown colour and will do all the tiles with this so to bring the two tiles together.
I will photograph the floor tiles when they are all done. Today I have started the electrics, installing lights and a socket.
Update March 12th 2009
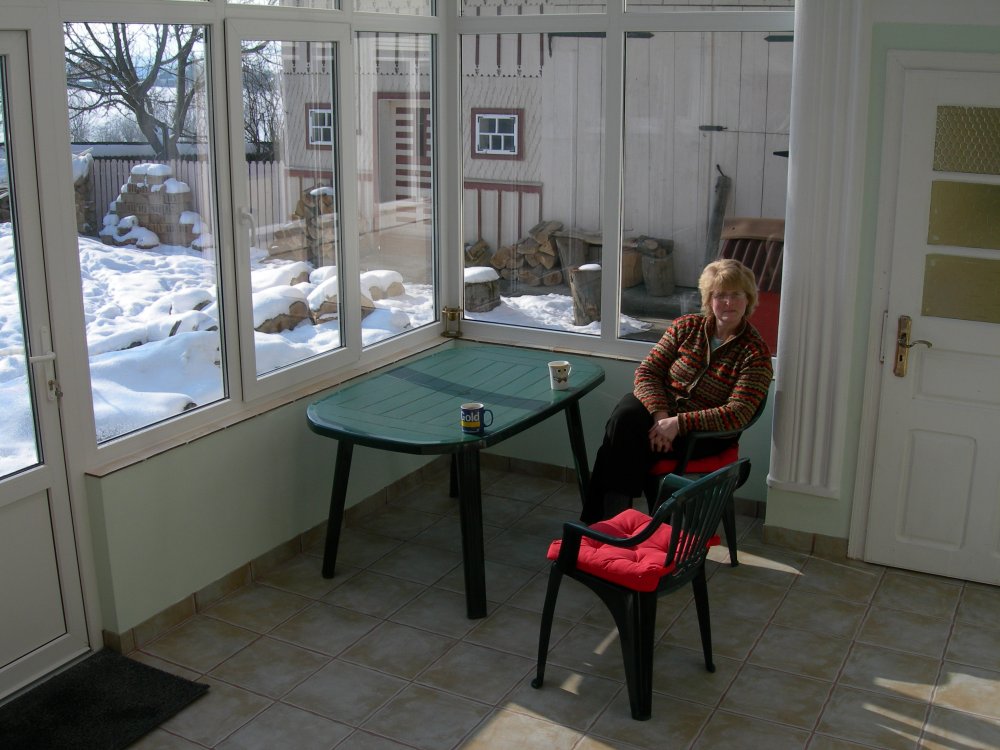
The finished conservatory.
At last the conservatory is finished. All the tiles are laid, electrics installed and even furniture there to be used.
The photo to the left was taken on the 24th of February, the day after finally finishing it. You will see Sue sitting enjoying a cup of tea. As we don't have any tables and chairs for the conservatory we have used the garden furniture while we see what we want.
As you will see from the picture there was still snow on the ground and I think it was about zero degrees centigrade that day but because the sun was shining it was around sixteen degrees inside. Warm enough to sit in.
We have already seen temperatures of twenty nine degrees when the sun was strong and the outside temperature was around seven degrees. We know it will be too warm in the summer but it has been great at keeping the house warm during this winter. If it is warm during the day we can keep the door open to the house and increase the temperature of the hall by up to four degrees.
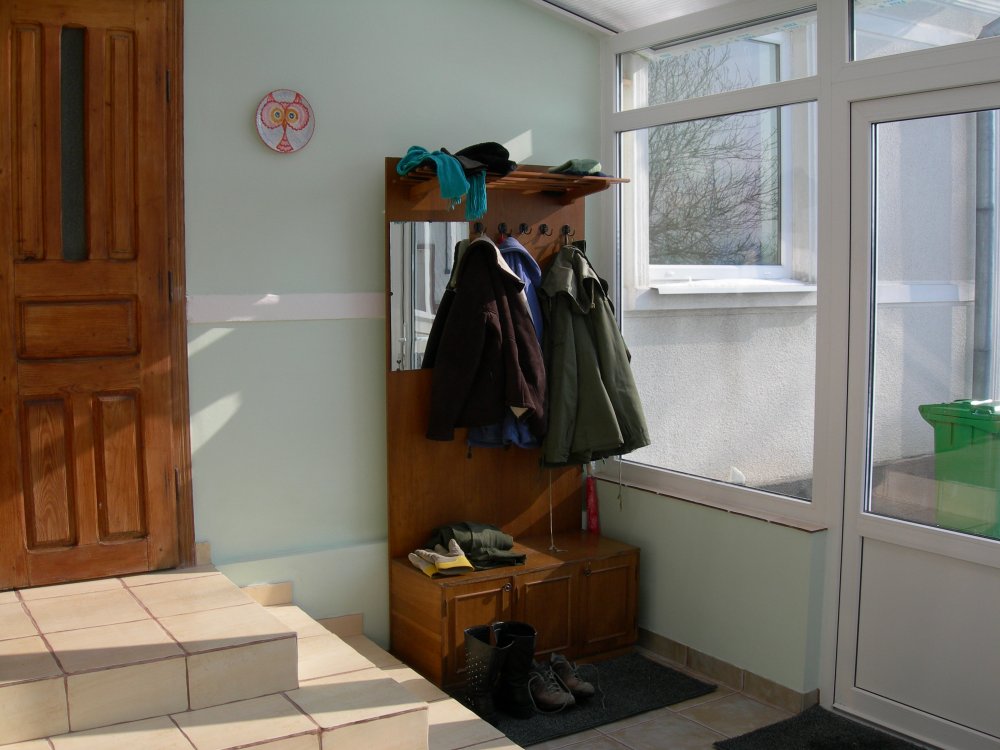
The finished conservatory.
This picture shows the other end of the conservatory, taken on the same day as the picture above. We moved the coat stand into here and this has given us more room in the hall.
Now we don't have to go outside to go from the house to the kitchen making it warmer and dryer for us. It has turned out exactly what we wanted and we are very pleased with it.