
Hot water through a solar project.
My attempt at saving money.
In this page I want to show how I made myself a solar water heater on the cheap. Anyone who has some sort of DIY capabilities can do the same.
The first thing I did was to research all I could from the Internet. There are good pages and not so good pages out there and also others that want to sell you plans. Of course you won't know how good the plans are until you part with your money and not all are good. One site I found very useful was Renewable Energy UK There are more specific links later in this page.
After my research I found a way to make what I wanted using a radiator, the kind that heat up your home on a cold day. I set about finding the parts I needed and came up with a radiator about 1.8 metres long and .65 metres wide. The first thing I will point out is that you need a single panel radiator not a double one otherwise half of the water you heat will cool down and not be used. See picture below.
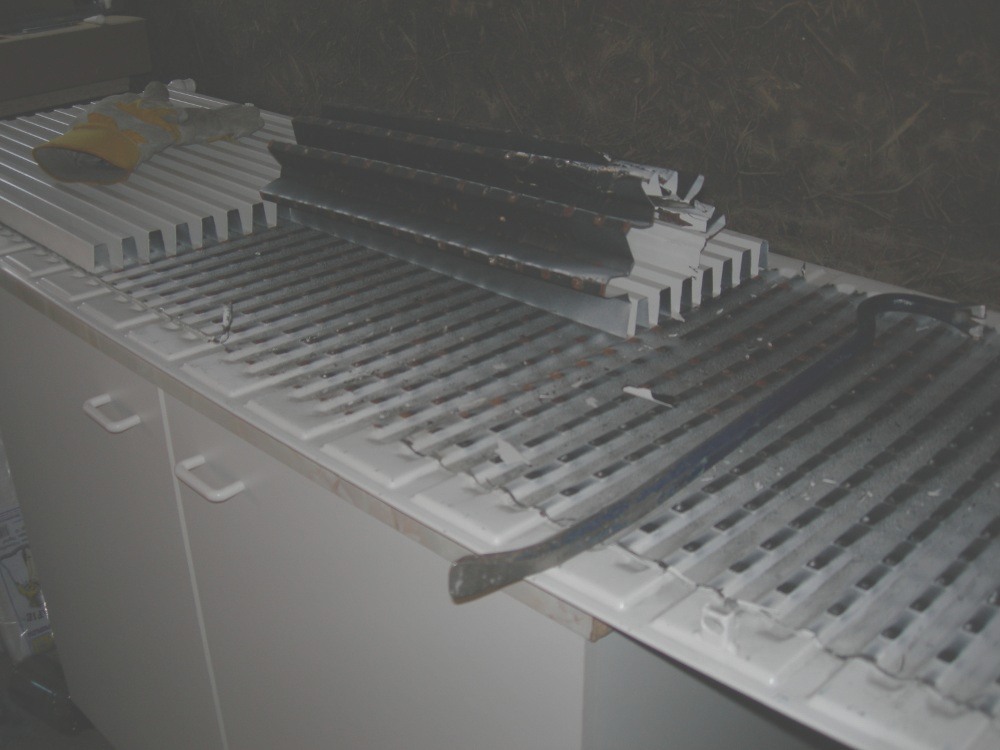
The radiator being prepared for painting.
The picture shows the radiator being prepared for painting. Because it was a single panel radiator there was some extra zig zags of metal (acting like heatsinks) to let the heat disperse into the room being warmed, Because we wanted the heat to stay in the radiator I took these off. They were only spot welded in place so it was not too much of a job to get them to move.
After removing the heat sinks I scrubbed the paint already on the radiator to get the new paint to adhere better then gave it a good coating of matt black to help get the heat out of the sun.
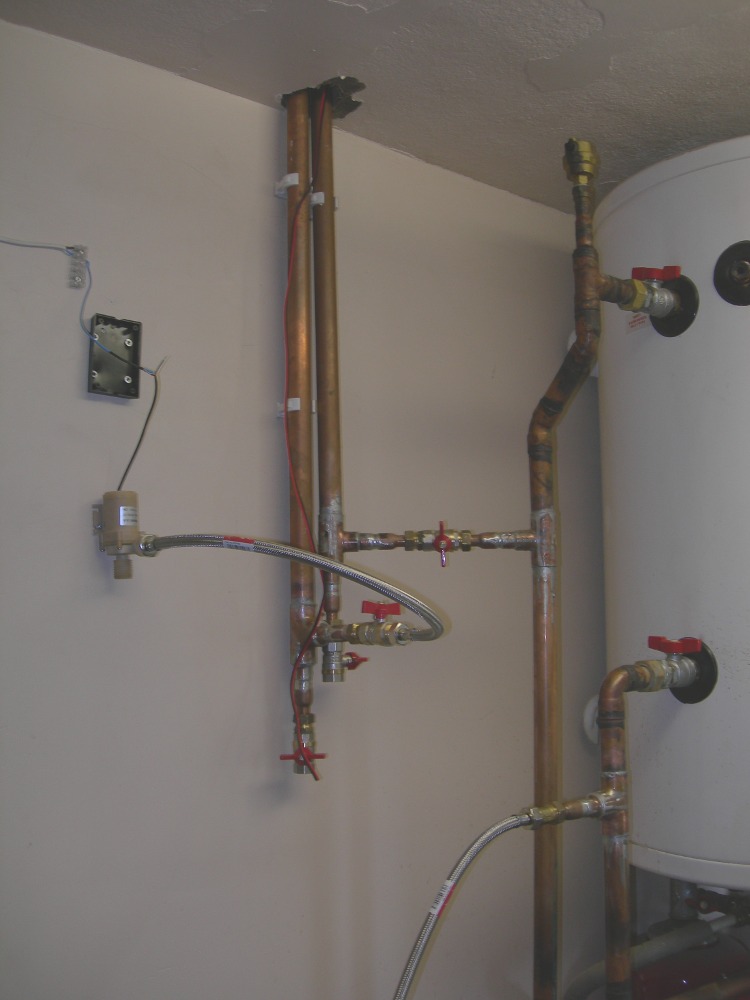
The basic pipework.
I then concentrated on the pipework that was to go from the boiler to the roof. Our hot water is heated from a wood burning stove and the water is heated indirectly so I was able to put two tees into the existing pipework and go from there.
I drilled a hole in the ceiling and put the two pipes into the roof space. I connected some pipes to them in the roof space but used ready insulated pipe so it won't freeze in the winter. I put in a tee so that I could end the pipes with a tap. That way I can drain down the system when the winter comes and the pipes won't burst. You can see these in the photo to the right.
Next I made up a wooden box for it to sit in and painted that with primer. I also made the holes for the pipework to exit and got it ready to mount onto the roof. After mounting the box and making sure it was secure I then painted the whole thing with a bitumen paint, this would make the box waterproof as well as preserving the wood. Our roof is a wooden roof and so the roof under the box was painted too so I don't have to remove the box to repaint the roof in the near future.
I then placed glass fibre insulation in the bottom of the box. This is done so there is not much air in the box and it helps with heat loss around the bottom of the radiator so the water in the radiator stays hotter longer. The radiator was then placed in the box and pipework from the radiator through the sides of the box was fitted. This gave me the positions to drill through the roof, something I had to do on a dry day and make sure I had got right.
Don't forget to use a South facing roof (for those in the Northern hemisphere) to get the best of the Sun.
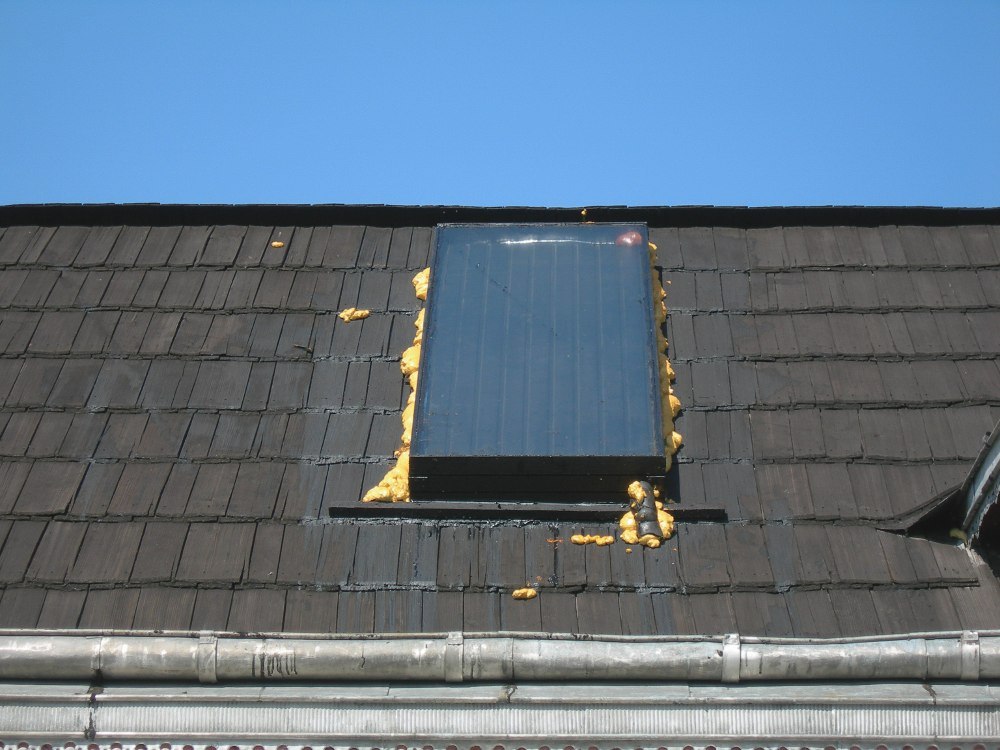
The finished box on roof.
I could then put the pipes from the roof space through the roof and connect them to the radiator and check for leaks. After this I placed a heat sensor to the pipe as it exited the radiator but inside the box and covered it with some insulation so it only got the heat from the pipe and not the air temperature. When I was happy all was well I placed a sheet of 4mm glass over the top of the box and sealed it with a bitumen sealer so no air could get in. I then sealed all of the holes where the pipes exited the box and anything else that looked like air could escape with expanding foam. I also sealed around the box with expanding foam so water could not get under the box and lie where it might rot the box in time.
My last task will be to go back on the roof and cut off the surplus foam and coat that with the bitumen paint. It will look better that in the photo after that is done.
Of course now we have hot water on the roof and as we know from school days hot water rises. That means we need to get that water from the roof to the hot water tank.
There are two main types of water heating system - direct and indirect. In an indirect system fluid such as anti-freeze is heated and then passed through a heat exchanger fitted to the water tank. The heat from the fluid raises the temperature of the water in the tank, and the water in the tank cools the fluid ready to be passed around the system again for further heating. The less complicated option is direct heating in which the water to be heated is itself passed around the system. Such a system can be put together by anyone with an intermediate level of DIY proficiency. There is an article on a direct system here and an article on a heat exchanger system can be found here.
Because I was tapping into an existing system it means I have installed an indirect system. Our hot water tank is heated this way from the wood burning boiler in the winter. It will be up to you what you decide to install depending on what you have already got in your home.
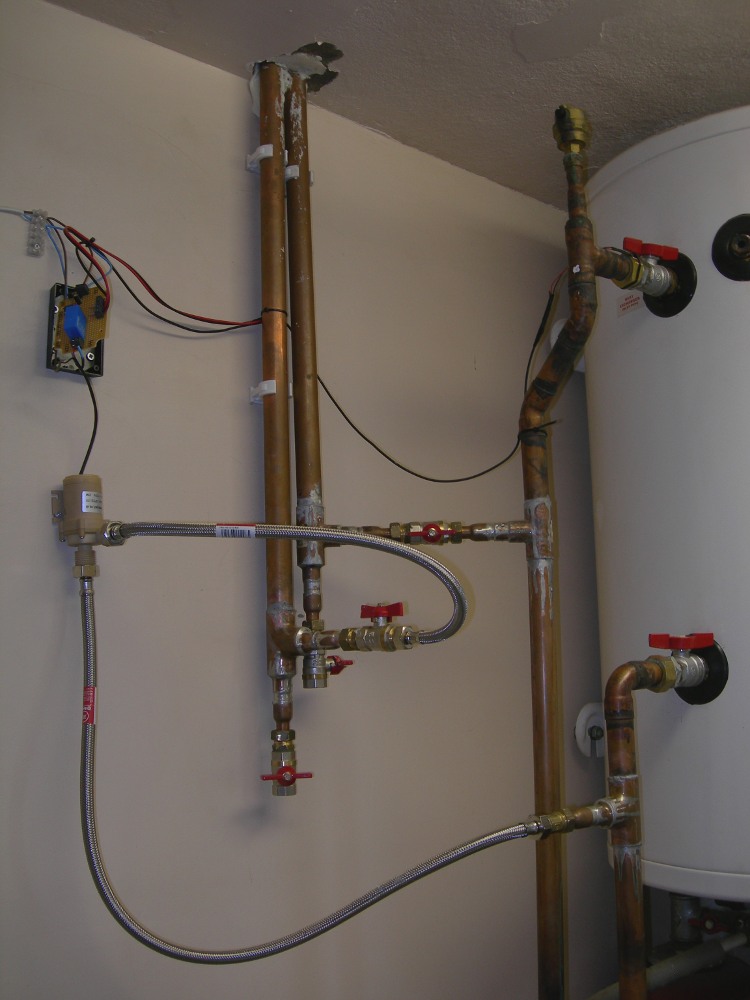
The pump in position.
What we now need is a pump to pump the water from the roof to the tank and a controller to control the pump. If we did not have the controller we would be pumping the water all the time and there would be not enough time to heat the water before it got back to the tank and so we would only have cold water. I found one on the pages of the REUK web site mentioned above and clicked on the link to the pump which seemed to be what I wanted. The link sends you to an Ebay page but there I found the guy's own web site where there was even more choice and because of Ebay's fees found the prices slightly cheaper. Have a look at his pumps here. I bought the SP20/20 at the top of his page. I found this to be better than the one pictured on REUK's web site as I could buy flexible pipes that screwed straight onto the connectors and so did not have to play around with hoses and clips. Whichever pump you use make sure it has a good temperature range as the water can get quite hot on a very sunny day. These can pump water up to 120 degrees C.
Next comes the pump controller. REUK have more than one on their web site but I went for the one that has the relay fitted. This can be found here. This is better than the basic one they first built because it uses a microcontroller and a relay.
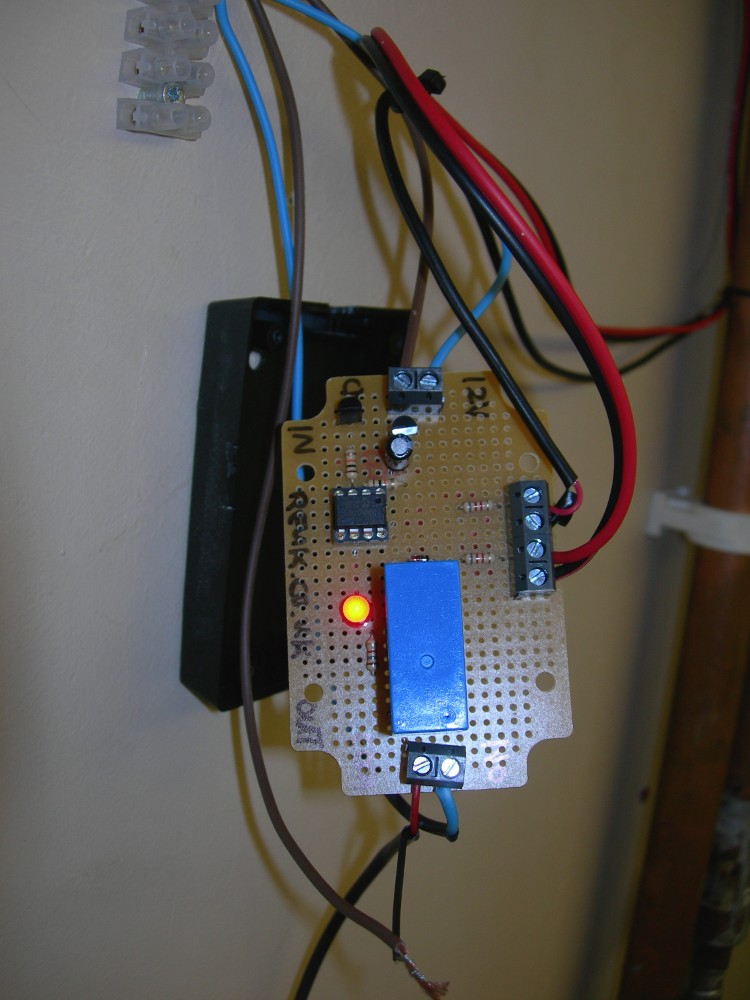
The working controller.
Basically the microcontroller monitors the temperature of solar water heating panel and the hot water storage tank. Basically, if the panel is hotter than the tank we want the pump to switch ON - so we can increase the heat of the water in the tank; if the tank is hotter than the panel then we want the pump should be OFF - we don't want to cool the water in the tank by pumping from the solar panel.
In reality, things are a little bit more complicated. For example, when the temperature of the tank and panel are nearly equal, there is the risk of the pump being switched on and off rapidly - a sure fire way of damaging the pump and also wasting energy. Therefore, the controller is programmed to turn on the pump only if the temperature of the panel has been hotter than that of the tank constantly for 30 seconds. Similarly, the pump once switched on is kept on for a minimum of 20 seconds so a sudden (unlikely) drop in panel temperature will not cause the pump to switch immediately off.
The second temperature sensor was fitted on the tank so that the controller can turn the pump on and off as needed. You can see the controller in the picture of the pump and a close up of the controller working is on the right. It will look neater when it is fully fitted into it's box.
What would I do different? Yes it all works and I am happy with the results. I would make the box for the radiator slightly bigger. The reason for this is that I have the pipes from the radiator going outside of the box before they turn and go through the roof. If I turned them inside the box and put them through the floor of the box they would be fully enclosed in the box and would maybe lose less heat. As it is when the pump turns on and the hot water is pumped through the pipes I can not hold the pipes with my bare hands so I am getting enough heat with the system.
As the system is new and I have only just finished I have no real data on how it is working. If I change anything or think anyone will be interested I will post updates here.
Update May 2012.
When I installed the system and got it going I found that it would not work correctly. Nothing to do with the system really except that I could not get a temperature sensor onto the wall of the tank. I attempted to get it going by putting a sensor on the pipe as it exited the tank but that was not working properly.
I contacted REUK and the guy said to send it back and he would do some adjustments. He made it so that when the panel on the roof got to a certain temperature, around 50 degrees C it would start the pump and stay on for an amount of time. The time could be programmed into the controller in full minutes. I set mine to 1 minute as I found if I set it at two minutes the water had already started to run cooler to the tank. By the time I had finished all of this last year it was around September/October but I found it was heating the water in the tank no problem.
So, now it is May 2012 and already we have had temperatures of 30 degrees C. Nice and warm for spring. I have been monitoring the system and one day I thought it had broken. The system was running continuously and the pump was not turning off after the programmed minute. Doing some checks I found that the temperature at the panel on the roof was not cooling because it was so hot outside and the sun was so strong. This was great of course as the water circulating was constantly above the set 50 degrees C and so was heating the water in the tank very well. I can say I am more than pleased with the system and I am looking forward to summer. So far there have been days when the electric has just not turned on for more than 24 hours because the water in the tank has been so hot.